Administrators' guide to understanding the system's default settings checklist
Add or remove LSPs
Subcontractor - LSP
Definition of a sub-contractor
Note
In XTM, the contractor refers to the end client (I.e the company that bought XTM).
The subcontractor refers to the LSP hired by the contractor to complete the jobs or tasks assigned to them by the contractor.
Subcontractors are defined separately from contractors.
How does a subcontractor complete their jobs and tasks?
The subcontractor completes jobs or tasks using their instance of XTM, with users assigned in the subcontractor instance, by the subcontractor Project Manager.
Important
For security purposes, the contractor does not have any visibility into the subcontractor's user details and vice-versa.
LSP users have no direct contact with the contractor's users.
The downside is that the contractor can't view any statistics for individual LSP linguists.
The subcontractor's instance of XTM is synched in real-time with the contractor's instance.
Therefore the contractor can monitor the subcontractor's work in real-time within the XTM Workbench (linguist view) application.
XTM licensing for subcontractors
Each subcontractor can purchase their own XTM license for the number of concurrent users they use.
Subcontractors can also download a free XTM subcontracting license.
In this case, the subcontractor borrows the user licenses they need from the contractor's instance of XTM to complete their assigned tasks.
It is the contractor that determines how many concurrent user licenses the subcontractor can borrow.
Follow this guide in order to add an LSP to XTM.
Setting the language combinations (pairs) available to Project Managers to only show those used by your corporation
Tip
By default, all language combinations built-in to XTM are shown to Project Managers when they add their users and projects.
Administrators can limit the language combinations available to Project Managers to only those that your organization uses, thus simplifying a Project Manager's job and maintaining company standards.
Language combinations
Tip
By default, all language combinations built-in to XTM are shown to Project Managers when they add their users and projects.
Administrators can limit the language combinations available to Project Managers to only those that your organization uses, thus simplifying a Project Manager's job and maintaining company standards.
Commonly referred to as language pairs
A language combination consists of a single source language (i.e the language of the content to be translated) and a single target language (I.e the language the source content is being translated into).
Language combinations are configured in the:
Configuration screens, by an Administrator using this procedure. This becomes a global configuration.
Note
The procedure indicated here merely limits the number of language combinations available to users globally in XTM, thus speeding up and simplifying their work.
By default, all language combinations are made available to everyone. There are hundreds of language combinations available in XTM.
Language Combinations are assigned to:
Linguists (In the user definition screen).
Customers (In the customer definition screen).
Tip
This is used to limit language combinations that can be configured in the terminologies and translation memory files assigned to this customer.
User Groups (in the user group definition screen).
Tip
The language set here overrides the language settings assigned to each individual linguist that is part of this group when the user group is assigned to a workflow step.
LSPs (in the LSP configuration screens).
Tip
There is only a need to configure language combinations when using multiple LSPs, each one with its own language expertise.
An individual project’s general section (in the project configuration screen).
Tip
This determines the languages that this project will be translated into and determines the linguists, user groups, and LSPs that are made available for allocation to the workflow steps.
A project templates details section.
Language codes
The following languages are currently available in XTM.
If you require other languages:
To request support
Visit our Support Portal.
LANGUAGE | CODE |
|---|---|
Abkhazian | ab |
Acholi | ach |
Afar | aa_ET |
Afrikaans (South Africa) | af_ZA |
Akan | ak |
Albanian | sq_AL |
Amharic (Eritrea) | am_ER |
Amharic (Ethiopia) | am_ET |
Ancient Greek | grc_GR |
Anuak | anu |
Arabic | ar_AA |
Arabic (Algeria) | ar_DZ |
Arabic (Bahrain) | ar_BH |
Arabic (Chad) | ar_TD |
Arabic (Egypt) | ar_EG |
Arabic (Iraq) | ar_IQ |
Arabic (Jordan) | ar_JO |
Arabic (Kuwait) | ar_KW |
Arabic (Lebanon) | ar_LB |
Arabic (Libya) | ar_LY |
Arabic (Mauritania) | ar_MR |
Arabic (Morocco) | ar_MA |
Arabic (Oman) | ar_OM |
Arabic (Palestinian Territory) | ar_PS |
Arabic (Qatar) | ar_QA |
Arabic (Saudi Arabia) | ar_SA |
Arabic (Sudan) | ar_SD |
Arabic (Syria) | ar_SY |
Arabic (Tunisia) | ar_TN |
Arabic (United Arab Emirates) | ar_AE |
Arabic (Western Sahara) | ar_EH |
Arabic (Yemen) | ar_YE |
Aranese | aran_ES |
Armenian | hy_AM |
Assamese | as_IN |
Assyrian Neo-Aramaic | aii |
Asturian (Spain) | ast_ES |
Aymara | ay_BO |
Azeri (Cyrillic - Azerbaijan) | az_AZ_Cyrl |
Azeri (Latin - Azerbaijan) | az_AZ_Latn |
Bambara | bam |
Bari | bfa |
Bashkir | ba_RU |
Basque | eu_ES |
Bassa | bsq |
Batak Toba | bbc |
Belarusian (Belarus) | be_BY |
Bemba | bem |
Bengali (Bangladesh) | bn_BD |
Bengali (India) | bn_IN |
Bhutani | bal_IR |
Bihari (India) | bh_IN |
Bikol | bik |
Bislama (Vanuatu) | bi_VU |
Bosnian (Cyrillic) | bs_BA_Cyrl |
Bosnian (Latin) | bs_BA_Latn |
Breton (France) | br_FR |
Bulgarian (Bulgaria) | bg_BG |
Buli (Ghana) | bwu |
Burmese | my_MM |
Burushaski | bsk |
Carolinian | cal |
Catalan | cmn |
Catalan (Spain) | ca_ES |
Cebuano (used in Philippines) | ceb |
Chaldean Neo-Aramaic | cld |
Cham (Eastern) | cjm |
Chamorro | cha |
Cham (Western) | cja |
Changana | ts_ZA_changana |
Cherokee | chr |
Chichewa (Malawi) | ny_MW |
Chinese (Cantonese) | zh_YUE |
Chinese (Hong Kong) | zh_HK |
Chinese (Malaysia) | zh_MY |
Chinese (Mandarin Traditional) | cmn |
Chinese (Mandarin Traditional Taiwan) | goyu |
Chinese (Simplified) | zh_CN |
Chinese (Simplified Hong Kong) | zh_HK_Hans |
Chinese (Singapore) | zh_SG |
Chinese (Traditional) | zh_TW |
Chin Tedim | ctd |
Chuukese | chk |
Corsican | co_FR |
Creoles and pidgins (English based) | cpe |
Creoles (French based) | cpf |
Croatian | hr_HR |
Croatian (Bosnia and Herzegovina) | hr_BA |
Czech | cs_CZ |
Dan | dnj |
Danish | da_DK |
Dari | prs_AF |
Dholuo | luo |
Dinka | din |
Divehi | dv_IN |
Dothraki | mis |
Dutch | nl_NL |
Dutch (Belgium) | nl_BE |
Eastern Armenian | hy_AM_arevela |
English (Asia) | en_142 |
English (Australia) | en_AU |
English (Austria) | en_AT |
English (Bahamas) | en_BS |
English (Bahrain) | en_BH |
English (Belgium) | en_BE |
English (Brunei) | en_BN |
English (Canada) | en_CA |
English (Chile) | en_CL |
English (China) | en_CN |
English (Croatia) | en_HR |
English (Cyprus) | en_CY |
English (Czechia) | en_CZ |
English (Denmark) | en_DK |
English (Egypt) | en_EG |
English (Europe) | en_EU |
English (Finland) | en_FI |
English (France) | en_FR |
English (Germany) | en_DE |
English (Holland) | en_NL |
English (Hong Kong) | en_HK |
English (Hungary) | en_HU |
English (India) | en_IN |
English (Ireland) | en_IE |
English (Israel) | en_IL |
English (Italy) | en_IT |
English (Japan) | en_JP |
English (Jordan) | en_JO |
English (Kenya) | en_KE |
English (Kuwait) | en_KW |
English (Luxembourg) | en_LU |
English (Malaysia) | en_MY |
English (Mexico) | en_MX |
English (Morocco) | en_MA |
English (Neutral) | en_NT |
English (New Zealand) | en_NZ |
English (Nigeria) | en_NG |
English (Norway) | en_NO |
English (Oman) | en_OM |
English (Pakistan) | en_PK |
English (Philippines) | en_PH |
English (Poland) | en_PL |
English (Portugal) | en_PT |
English (Puerto Rico) | en_PR |
English (Qatar) | en_QA |
English (Romania) | en_RO |
English (Russia) | en_RU |
English (Saudi Arabia) | en_SA |
English (Serbia) | en_RS |
English (Singapore) | en_SG |
English (Slovakia) | en_SK |
English (Slovenia) | en_SI |
English (South Africa) | en_ZA |
English (South Korea) | en_KR |
English (Spain) | en_ES |
English (Sweden) | en_SE |
English (Switzerland) | en_CH |
English (Taiwan) | en_TW |
English (Thailand) | en_TH |
English (Trinidadian) | en_TT |
English (Türkiye) | en_TR |
English (UK) | en_GB |
English (Ukraine) | en_UA |
English (United Arab Emirates) | en_AE |
English (US) | en_US |
Esan | ish |
Esperanto | eo |
Estonian | et_EE |
Ewe (Ghana) | ee_GH |
Falam Chin | cfm |
Fanti | fat |
Faroese (Faroe Islands) | fo_FO |
Fijian | fj_FJ |
Fiji Hindi | hif |
Filipino | fil_PH |
Finnish | fi_FI |
Flemish | nl_BE |
French (Algeria) | fr_DZ |
French (Belgium) | fr_BE |
French (Cameroon) | fr_CM |
French (Canada) | fr_CA |
French (Congo) | fr_CG |
French (France) | fr_FR |
French (Luxembourg) | fr_LU |
French (Morocco) | fr_MA |
French (Senegal) | fr_SN |
French (Switzerland) | fr_CH |
French (Tunisia) | fr_TN |
Frisian | fy |
Friulian | fur |
Fula | fu |
Ga | gaa |
Galician (Spain) | gl_ES |
Georgian | ka_GE |
German (Austria) | de_AT |
German (Belgium) | de_BE |
German (Germany) | de_DE |
German (Holland) | de_NL |
German (Luxembourg) | de_LU |
German (Pennsylvanian) | pdc |
German (Switzerland) | de_CH |
Greek | el_GR |
Greek (Cyprus) | el_CY |
Greenlandic | kl_GL |
Guarani | grn |
Gujarati | gu_IN |
Haitian Creole | ht_HT |
Hakha Chin | cnh |
Hausa | ha_NG |
Hausa (Ajami) | ha_Arab |
Hausa (Latin) | ha_Latn |
Hausa (Latin) | ha_Latn |
Hawaiian | haw |
Hazaragi (Afghanistan) | xz_AF |
Hebrew | he_IL |
Herero | hz |
Hiligaynon (Philippines) | hil |
Hindi | hi |
Hindi (India) | hi_IN |
Hindi (Latin) | hi_Latn |
Hindi (Thoda English) | hi_Latn_en |
Hmong | hmn |
Hmong (USA) | hmn_US |
Hungarian | hu_HU |
Icelandic | is_IS |
Igbo | ig |
Ilocano | ilo |
Inari | smn |
Indonesian | id_ID |
Interlingua | ia |
Interlingue | ie |
Inuktitut | iu |
Inupiak | ik |
Irish (Gaelic) | ga_IE |
Italian | it_IT |
Italian (Switzerland) | it_CH |
Iu Mien | ium |
Japanese | ja_JP |
Javanese | jv_ID |
Kaingang | kgp_BR |
Kannada (India) | kn_IN |
Karen | kar |
Karen (Sgaw) | ksw |
Kasem | xsm |
Kashmiri | ks |
Kayah (Eastern) | eky |
Kayah (Western) | kyu |
Kazakh | kk_KZ |
Khana or Ogoni proper | ogo |
Khmer | km_KH |
Kikongo (Kongo) | kg_CG |
Kikuyu | kik |
Kimaama | kig |
Kinyarwanda (Rwanda) | rw_RW |
Kirghiz | ky |
Kiribati | gil |
Kirundi | rn |
Klingon | tlh |
Konkani (India) | kok_IN |
Korean | ko_KR |
Kosraean | kos |
Krio | kri |
Kunama (Western Eritrea) | kun |
Kurdish (Iraq) | ku_IQ |
Kurdish (Kurmanji) | kmr |
Kurdish (Sorani) | ckb |
Kurdish (Türkiye) | ku_TR |
Laothian | lo_LA |
Latin | la |
Latvian | lv_LV |
Lautu Chin | clt |
Lingala | ln_CG |
Lithuanian | lt_LT |
Luba-Lulua | lua |
Luganda | lug |
Luxembourgish | lb_LU |
Macedonian | mk_MK |
Malagasy (Madagascar) | mg_MG |
Malayalam (India) | ml_IN |
Malay (Malaysia) | ms_MY |
Malay (Singapore) | ms_SG, |
Maltese | mt_MT |
Mam | mam |
Manipuri | mni |
Maori | mi_NZ |
Mara Chin | mrh |
Marathi | mr_IN |
Marshallese | mah |
Masai | mas |
Matu Chin | hlt |
Mixtepec Mixtec | mix |
Mizo Chin | lus |
Moldavian | mo_MD |
Mon | mnw |
Mongolian | mn_MN |
Montenegrin | sla_ME |
Morisyen (Mauritian Créole) | mfe_MU |
Mün Chin | mwq |
Nagamese | nag |
Nauru | na_NR |
Navajo | nv |
Ndebele | nd_ZW |
Nepali | ne_NP |
Nheengatu | yrl_BR |
Niuean | niu |
Northern Sotho (South Africa) | nso_ZA |
Norwegian | no_NO |
Norwegian Bokmaal | nb_NO |
Norwegian Nynorsk | nn_NO |
Nuer | nus |
Nyanja | ny |
Occitan | oc_FR |
Oriya | or_IN |
Oromo | om_ET |
Oshiwambo | kj |
Ottoman Turkish | ota |
Palauan | pau |
Pampangan | pam |
Pangasinan | pag |
Papiamento | pap |
Pashto | ps |
Pashto (Pakistan) | ps_PK |
Persian | fa_IR |
Pohnpeian | pon |
Polish | pl_PL |
Portuguese | pt_PT |
Portuguese (Angola) | pt_AO |
Portuguese (Brazil) | pt_BR |
Portuguese (Mozambique) | pt_MZ |
Punjabi | pa_PA |
Punjabi (India) | pa_IN |
Punjabi (Pakistan) | pa_PK |
Quechua | qu_PE |
Quenya | qya |
Rarotongan | rar |
Rhaeto_Romance | rm_CH |
Rohingya (Myanmar) | xr_MM |
Romanian | ro_RO |
Romanian (Moldova) | ro_MD |
Rotuman | rtm |
Rukiga | cgg |
Runyoro | nyo |
Russian | ru_RU |
Russian (Armenia) | ru_AM |
Russian (Azerbaijan) | ru_AZ |
Russian (Georgia) | ru_GE |
Russian (Moldova) | ru_MD |
Russian (Ukraine) | ru_UA |
Samoan | sm_WS |
Sangro | sg |
Sanskrit | sa_IN |
Sardinian | sc_IT |
Scots (Ireland) | sco_IE |
Scots (United Kingdom) | sco_GB |
Scottish Gaelic (Scotland) | gd_GB |
Senthang Chin | sez |
Serbian | sr_YU |
Serbian (Cyrillic) | sr_RS_Cyrl |
Serbian – Montenegro (Cyrillic) | sr_ME_Cyrl |
Serbian – Montenegro (Latin) | sr_ME_Latn |
Serbian – Serbia (Latin) | sr_RS_Latn |
Sesotho | st |
Setswana (Africa) | tn_ZA |
Shan | shn |
Shilluk | shk |
Shona | sn |
Sindarin | sjn |
Sindhi | sd_PK |
Singhalese | si_LK |
Siswati | ss |
Skolt | sms |
Slovak | sk_SK |
Slovenian | sl_SI |
Solomon Islands Pidgin | pis |
Somali | so_SO |
Soninke | snk |
Sorbian (Lower) | dsb_DE |
Sorbian (Upper) | hsb_DE |
Southern Kurdish | sdh |
Spanish (Argentina) | es_AR |
Spanish (Bolivia) | es_BO |
Spanish (Chile) | es_CL |
Spanish (Colombia) | es_CO |
Spanish (Costa Rica) | es_CR |
Spanish (Cuba) | es_CU |
Spanish (Dominican Republic) | es_DO |
Spanish (Ecuador) | es_EC |
Spanish (El Salvador) | es_SV |
Spanish (Guatemala) | es_GT |
Spanish (Honduras) | es_HN |
Spanish (International) | es_001 |
Spanish (Latin America) | es_419 |
Spanish (Mexico) | es_MX |
Spanish (Neutral) | es_NT |
Spanish (Nicaragua) | es_NI |
Spanish (Panama) | es_PA |
Spanish (Paraguay) | es_PY |
Spanish (Peru) | es_PE |
Spanish (Puerto Rico) | es_PR |
Spanish (Spain) | es_ES |
Spanish (Uruguay) | es_UY |
Spanish (USA) | es_US |
Spanish (Venezuela) | es_VE |
Sudanese Arabic | apd_SD |
Sudanese Arabic (Latin) | apd_SD_Latn |
Sundanese | sun |
Swahili | swa |
Swahili (Kenya) | sw_KE |
Swahili (Somalia) | sw_SO |
Swahili (Tanzania) | sw_TZ |
Swahili (Uganda) | sw_UG |
Swedish | sv_SE |
Swedish (Finland) | sv_FI |
Syriac | syr_TR |
Tagalog | tl_PH, |
Tahitian | ty |
Tajik | tg_TJ |
Tamil | ta_IN |
Tamil (Singapore) | ta_SG |
Tamil (Sri Lanka) | ta_LK |
Tatar | tt_RU |
Telugu | te_IN |
Tetum (Indonesia) | tet_ID, |
Tetum (Timor-Leste) | tet_TL |
Thado Chin | tcz |
Thai | th_TH |
Tibetan | bo |
Tigrinya | ti |
Tigrinya (Eritrea) | tir_ER |
Tigrinya (Ethiopia) | tir_ET |
Tokelauan | tkl |
Tok Pisin | tpi |
Tonga | to_TO |
Toposa | toq |
Tsonga | ts_ZA |
Tswana | tn_BW |
Turkish | tr_TR |
Turkmen | tk_TM |
Tuvaluan | tvl |
Twi | tw |
Ukrainian | uk_UA |
Urdu | ur_IN |
Urdu (Pakistan) | ur_PK |
Uyghur (China) | ug_CN |
Uzbek (Afghanistan) | uz_AF |
Uzbek (Cyrillic) | uz_UZ_Cyrl |
Uzbek (Latin) | uz_UZ_Latn |
Valencian | vc_ES |
Venda | ve |
Vietnamese | vi_VN |
Volapk | vo |
Waray (Philippines) | war |
Welsh | cy_GB |
Western Armenian | hy_AM_arevmda |
Wolof | wo |
Xhosa (South Africa) | xh_ZA |
Yao | yao |
Yapese | yap |
Yiddish | yi |
Yiddish (Israel) | yi_IL |
Yiddish (USA) | yi_US |
Yoruba | yo_NG |
Zande | zne |
Zigula | ziw |
Zotung Chin | czt |
Zou | zom |
Zulu (South Africa) | zu_ZA |
Zyphe Chin | zyp |
Examine the default XTM workflows and steps to determine if any additional work is needed
Workflows
Workflows consist of individual steps which are performed sequentially, that are executed once a project is started.
Tip
Linguists can accept or reject any workflow step assigned to them in a workflow.
Therefore workflows can flow in both directions i.e. a user can reject a task, effectively pushing the workflow step back to the previous assignment in sequence.
Common Workflow steps are translation, review, correction, DTP, etc.
Workflows consist of:
Workflow steps
Tip
Due dates can be added for each workflow step or they can be automatically calculated.
Workflows are assigned to:
Projects; Performed in the Workflows section of the project configuration screens.
Note
The workflow assigned can't be changed after project creation.
Linguists are assigned to each workflow step in a project for a given language;
(Workflow) Steps
Workflows are composed of steps.
Default workflow steps
The following drop-downs describe the default workflow steps available in XTM:
In this step, users can enter and edit translations and add comments.
The comments entered here are typically meant as issues for a project manager to resolve.
In this step, users can edit translations and enter comments.
Edits made by the corrector are automatically registered under their username and shown in the comments section of the segment in Workbench (CAT). Each change (translation or correction) in the segment is included in the comments for each change to the translation that is made.
In this step, users can only enter comments about translations.
Users can't edit the translation.
The typical next step after a review is a correction.
Allows you to automatically approve the TM of changed segments, segments set to done (completed), or ICE and leveraged matched segments.
Without this step only reviewed, corrected or LQAd strings (the next step described below) enter the TM.
This can be overwritten in the workflow configuration. Workflows consist of individual workflow steps that are tied together. Within the workflow checking the "Approve TM" box automatically approves TM for a given step in the workflow.
In this step, users can check translation errors.
This is exactly like a review step except errors can be categorized into one of the many predefined error types XTM provides.
Along with being able to enter comments, this allows for better traceability and continuous improvement initiatives.
Typically a correction step follows.
The linguist in this case then tags translation errors with one of these LQA error codes for easier tracking.
Translation errors marked with LQA codes are stored against the translator in XTM and can be viewed by opening the rating section for each user under their Quality tab, and reports can be generated on a project level or across multiple projects.
These categorized reasons can be modified by an administrator, using this procedure.
Workflow step types
Each workflow step is assigned a type (category).
The step types in XTM are:
In this step, users can enter and edit translations and add comments.
The comments entered here are typically meant as issues for a project manager to resolve.
In this step, users can edit translations and enter comments.
Edits made by the corrector are automatically registered under their username and shown in the comments section of the segment in Workbench (CAT). Each change (translation or correction) in the segment is included in the comments for each change in the translation that is made.
In this step, users can only enter comments about translations.
Users can't edit the translation.
The typical next step after a review is a correction.
In this step, users can check translation errors.
This is exactly like a review step except errors can be categorized into one of the many predefined error types XTM provides.
Along with being able to enter comments, this allows for better traceability and continuous improvement initiatives.
Typically a correction step follows.
The linguist in this case then tags translation errors with one of these LQA error codes for easier tracking.
Translation errors marked with LQA codes are stored against the translator in XTM and can be viewed by opening the rating section for each user under their Quality tab, and reports can be generated on a project level or across multiple projects.
These categorized reasons can be modified by an administrator, using this procedure.
Files can be downloaded but not updated.
Example entering cost details, approving cost and proposals, printing files, sending files to client
Files can be downloaded and updated in XTM, but the TM and project segments will not be modified.
Example DTP (Desktop Publishing)
Allows you to automatically approve the TM of changed segments, segments set to done (completed), or ICE and leveraged matched segments.
Without this step only reviewed, corrected or LQAd strings (the next step described below) enter the TM.
This can be overwritten in the workflow configuration. Workflows consist of individual workflow steps that are tied together. Within the workflow checking the "Approve TM" box automatically approves TM for a given step in the workflow.
Also sets the minimum XLIFF:doc status for segments at a specific point in the workflow.
Workflow steps are assigned to:
Workflows, globally by an administrator using this procedure.
Workflows by a project manager within a project. Edit the project then click on the workflow tab to the left, then the edit workflow button at the top.
Tip
Workflow steps are assigned to workflows globally by an administrator.
A project manager, however, can overwrite the global configuration within any project that they have access to.
The following can be assigned to workflow steps:
Workflow steps are assigned to users with the linguist role in the user configuration screen. Typically this represents the job function that a linguist has.
An administrator can create custom workflow steps using the procedure indicated here.
Customize how translation memory is used
Customizing the default translation memory settings
Set display limits of TM matches in XTM Workbench (linguists view).
Note
By default, a maximum of three of each match type are displayed to the linguist in Workbench as matches.
Tip
By default, the segment ID is stored in TM. This affects the matching mechanism.
OPTIONAL - Consult the TM Reference Guide. for a description of all other translation memory items that can be configured
Setting TM auto-fill criteria
Tip
A detailed reference on TM AutoFill can be found here.
All items below are set in the TM configuration screens.
Set AutoFill based on ICE Matches by selecting the appropriate option in the Populate target with match drop-down located in the ICE matches section.
Tip
Auto Fill for ICE Matches is enabled by default. This option takes precedence over all others if multiple match types exist.
Set Auto fill based on Leveraged Matches by selecting the appropriate option in the Populate target with match drop down located in the Leveraged matches section.
Tip
Auto Fill for Leveraged Matches (Only if inlines are the same) is enabled by default. This option takes precedence over all others, except for ICE matches, if multiple match types exist.
OPTIONAL - Set Auto fill based on Fuzzy Matches, by selecting the appropriate option in the Populate target with match drop down located in the Fuzzy matches section.
Tip
Auto Fill for Fuzzy Matches is disabled by default. This option is last in precedence if multiple match types exist.
Tip
This type of Auto Fill is useful for continuously updated projects and files where tight deadlines exist such as having to release a product quickly.
It also minimizes the work of a translator who can then easily detect the minor changes
OPTIONAL - Set Auto fill based on Fuzzy Repeats, by selecting the appropriate option in the Populate target with match drop down located in the Fuzzy Repeats section.
Tip
These types of matches are useful to give the linguists a starting point based on similar segments in the same file that were just translated. Depending on the fuzzy match it could save them time to simply modify the auto populated fuzzy match rather than force them to select the fuzzy match (more clicks) or to start from scratch.
Repeat fuzzy matches are applied if that given segment has no specific TM matches (ICE, Leveraged, or Fuzzy).
Set display limits of TM matches in XTM Workbench (linguists view)
Tip
All items below are set in the TM configuration screens.
Set the number of ICE Matches to display in Workbench in the Number of matches to display drop down located in the ICE matches section.
Tip
The default value is 3. The range of selections is between 1 and 3.
Set the number of Leveraged Matches to display in Workbench in the Number of matches to display drop down located in the Leveraged matches section.
Tip
The default value is 3. The range of selections is between 1 and 5.
Set the Fuzzy Match ranges to display in Workbench in the Show portion in the Fuzzy Match section.
Tip
The default is to show all fuzzy matches in the ranges of 75-84%, 85-94%, 95-99%. Any one of these ranges gone be disabled in the drop-down associated with any of these ranges.
Set the number of Fuzzy Matches to display in Workbench in the Number of matches to display drop-down in the Fuzzy Match section.
Tip
The default value is 3. The range of selections is between 0 and 5.
Repeat steps 3 and 4 for Fuzzy Repeats.
Storing the segment ID in the TM
To include the segment ID in the TM for a given segment:
Go to Configurations->Settings->Translation>TM.
Scroll near the bottom of the Matches General section.
In theModify the existing TM record if the project segment with Segment ID has the same section check the box for Segment ID
Translation memory (TM)
Translation memory typically consists of the last known good translation for a given segment (text).
Translation memory is assigned and segmented by the following:
See the list below for a summary of how to maximize the use of translation memory in XTM:
Importing translations from other TMS packages
Translation memories can be imported into XTM from a TMX (the standard Translation Memory file format) or from translations stored in XLIFF files or Excel files.
Tip
For best results, we recommend using the TMX v 4b format.
Once the translations are imported via the TM file, the source (segment) text will need to be uploaded to a new project or an existing project's files tab.
Take note of the following items in regards to segmentation:
Source strings in XTM are segmented by individual sentences. This default setting can be changed.
The advantage is that XTM can incorporate ICE matching and provide smaller segments to translators, which increases their quality and efficiency.
Many other TMS vendors segment strings differently, oftentimes providing larger segments to translators. In such cases, the TM that is imported into XTM from the other TMS vendor will not always provide perfect matches.
Applying context to TM
Note
A single word or string may have multiple meanings. For example, an apple can be a fruit or a computer brand. Applying context will allow XTM to provide better suggestions for any segment and improve the accuracy of the TM Auto-Fill functions.
Tip
XTM has the ability to add custom context rules not indicated here. Please contact your XTM point of contact for more details.
The following methodologies can be used to apply context to segments stored in translation memory:
ICE (context) match
An ICE (In Context Exact) match is a translation that when matched against what's stored in TM, guarantees a high level of appropriateness because it has the same context
Important
In XTM an ICE match occurs when the source content in the current, previous and next segment is an exact match with the current, previous and next segment in TM (I.E the same location in a paragraph). ICE Matching is most relevant when source content is segmented by sentence as opposed to paragraph.
XTM Determines if an ICE or Leveraged Match exists using the following logic:
If the source text is identical to the one stored in TM, then XTM checks if a segment has a segment ID.
If the segment has a segment ID then XTM tries to find if an ICE (context) match exists by matching the source text segmentID with the one stored in TM for that string.
Tip
To include the segment ID in the TM please click here for instructions.
If the segment does not have a segment ID then XTM tries to find if an ICE (context) match exists by matching the source text alone.
When neither of the segmentID / context conditions is met, a leveraged match is returned.
When the translation is saved and the translation becomes approved for TM, XTM saves the translation in the TM and includes the segment ID (if activated) along with the source text, target text, and context (ICE match) by default.
Consider the segment We painted it red last week as used in the following paragraph:
My house used to be yellow.
We painted it red last week.
It looks very different now.
Is not a 100% ICE Match but is a Leveraged Match with the following:
My house used to be very ugly.
We painted it red last week.
It looks nicer now.
The original context was about a color scheme, but the context in the second paragraph is about beauty. Therefore the translation for the segment We painted it red last week may contain different adjectives to describe its beauty versus its.
TM penalty profiles
Penalty Profiles penalize the percentage match of a fuzzy match.
Tip
Example: Segment X has an 80% Fuzzy Match against an entry in TM. However, the TM entry was stored for the prescription drug product whereas the translation is applied to over-the-counter drug products. Both are different products and certain segments have slightly different meanings between products. Applying a TM penalty of 5% lowers the fuzzy match from 80% to 75% accordingly.
XTM can apply penalty profiles based on the following criteria:
Tags.
TM Status (Approved or Not Approved).
XLIFF:doc status (Translated, New, Rejected, Validated, Proofed).
Target Language for all projects or per project.
Note
This penalty (Target Language) supersedes all other penalty profiles when more than one is triggered.
Note
The only languages that can have an associated TM Penalty Profile are: Arabic, Dutch, English, French, German, Italian, Portuguese, Spanish
If Multiple ICE or Leveraged matches exist for a given segment.
TM penalty profiles are created in Configuration->Data->Tags->TM Penalty Profiles.
TM matching reference
There are four basic mechanisms for providing translation matches against translation memory and auto-filling against the contents of the translation memory:
ICE (context) match
An ICE (In Context Exact) match is a translation that when matched against what's stored in TM, guarantees a high level of appropriateness because it has the same context
Important
In XTM an ICE match occurs when the source content in the current, previous and next segment is an exact match with the current, previous and next segment in TM (I.E the same location in a paragraph). ICE Matching is most relevant when source content is segmented by sentence as opposed to paragraph.
XTM Determines if an ICE or Leveraged Match exists using the following logic:
If the source text is identical to the one stored in TM, then XTM checks if a segment has a segment ID.
If the segment has a segment ID then XTM tries to find if an ICE (context) match exists by matching the source text segmentID with the one stored in TM for that string.
Tip
To include the segment ID in the TM please click here for instructions.
If the segment does not have a segment ID then XTM tries to find if an ICE (context) match exists by matching the source text alone.
When neither of the segmentID / context conditions is met, a leveraged match is returned.
When the translation is saved and the translation becomes approved for TM, XTM saves the translation in the TM and includes the segment ID (if activated) along with the source text, target text, and context (ICE match) by default.
Consider the segment We painted it red last week as used in the following paragraph:
My house used to be yellow.
We painted it red last week.
It looks very different now.
Is not a 100% ICE Match but is a Leveraged Match with the following:
My house used to be very ugly.
We painted it red last week.
It looks nicer now.
The original context was about a color scheme, but the context in the second paragraph is about beauty. Therefore the translation for the segment We painted it red last week may contain different adjectives to describe its beauty versus its.
Leveraged match
A leveraged match is when a sentence or phrase in a translation memory (TM) is the same phrase in a different context as the sentence or phrase the translator is currently working on.
Tip
Context is determined via ICE matching.
Fuzzy matches
Refers to the situation when a sentence or phrase in a translation memory (TM) is similar (but not a 100% ICE or Leveraged match) to the sentence or phrase the translator is currently working on. The TM tool calculates the degree of similarity or “fuzziness” as a percentage figure.
XTM Workbench (CAT) tool will show up to 5 fuzzy matches with the highest match rate for a given segment.
Note
This is configured under configuration->Settings->Translation->TM in the Fuzzy Matches section.
Fuzzy Match rates are calculated using one of the algorithms described here.
Fuzzy repeats
Refers to segments with no matches in the TM, but that are quite similar to each other within the project to be translated.
XTM Workbench (CAT) tool will show up to 5 fuzzy matches with the highest match rate for a given segment. This is configured under configuration->;Settings->;Translation->;TM in the Fuzzy Matches section.
TM clean up tools
XTM provides an interface for a TM Expert to perform the following tasks on any individual segment in the TM:
Warning
Only the TM Expert role has access to this feature.
Change the translation text (target).
Change the TM Status (Approved or Not Approved)
Delete a Segment.
This is performed in the TM->Manage window on a per language combination and customer level.
Tip
The advantage of making changes in this location is that XTM provides a total of 14 filters (search criteria) to narrow down the entries being verified.
Auto filling translations
Note
Auto filling with TM entries is done first if machine translation is enabled.
Auto filling occurs each time a project starts or is reanalyzed.
The configuration is done here in the following sections respectively:
ICE Matches
Leveraged Matches
Fuzzy Matches
Fuzzy Repeats
Translations can be configured to auto-fill automatically with a TM entry when any single one or any combination of the following occurs :
ICE match autofill options
ICE Matches where inline variables are the same in the segment and in the TM are auto-filled by default.
ICE matches where inline variables in the source segment and TM entry do not match can also be auto-filled. In this case, the inline variable in the source segment is copied to the translation.
Leveraged match autofill options
XTM can also be configured to auto-fill leveraged matches where inline variables in the source segment and TM entry do not match.
In this case, the inline variable in the source segment is copied to the translation.
Fuzzy match autofill options
95-99%
85-94%
75-84%
Fuzzy repeat autofill options
95-99%
85-94%
75-84%
TM approval mechanisms
Note
XTM automatically stores segments in TM as unapproved.
By default, XTM does not approve any translations for a segment in TM unless the following configurations are made:
Adding a TM Approve workflow step as part of the workflows.
Note
This is an automatic step type that automatically approves all of the segments translated during the current workflow in the TM. The step is closed automatically once the segments are approved.
Within any step in a workflow, there is a checkbox option to approve TM. This automatically approves the segment's translation in TM once it's completed.
Note
This is typically used in a correction or review workflow step.
Manually (no configuration required) regardless of the current state of a project. Simply edit a project using the
 icon and select actions->Approve TM for this project. This approves all of the translations currently in the project for entry into the TM.
Rules for overwriting TM entries
Segments that have a 100% leveraged or ICE match translation can optionally be edited. The new TM entry will be created if the translation for such a match is edited.
Tip
By default, translations populated by ICE and Leveraged TM entries are locked for translation. To change this setting go to Configuration->Settings->Translation->TM. In the first section; Matches General look for the Mark segments as locked when checkbox, and uncheck it in order to enable edits to such translations.
Any combination of the following criteria can be set for editing 100% leveraged or ICE matched translations:
Modify the existing TM record if the project segment has the same:
Modify the existing TM record if the project segment and Segment ID have the same:
Source (i.e. the segment source text is the same as the TM Entry).
Inlines (i.e. the segment source text has the same inlines as the TM Entry).
Context (i.e. the segment source text has the same context as the TM Entry).
Tags (i.e. the segment source text has the same tags as the TM Entry).
Segment ID (i.e. the segment source text has the same segment ID as the TM Entry).
Tip
To change this settings go to Configuration->Settings->Translation->TM. In the first section; Matches General and change the Modify the existing TM record if the project segment .. entries.
The TM is live, so whatever happens anywhere inside or outside the project can optionally be leveraged even as a full match within XTM Workbench (CAT) for the linguists.
This is done by opening the project editor's General Info Tab and choosing the customers whose translation memory is to be leveraged, even if these customers are outside the scope of the project.
Translation memory (TM)
Translation memory typically consists of the last known good translation for a given segment (text).
Translation memory is assigned and segmented by the following:
See the list below for a summary of how to maximize the use of translation memory in XTM:
Importing translations from other TMS packages
Translation memories can be imported into XTM from a TMX (the standard Translation Memory file format) or from translations stored in XLIFF files or Excel files.
Tip
For best results, we recommend using the TMX v 4b format.
Once the translations are imported via the TM file, the source (segment) text will need to be uploaded to a new project or an existing project's files tab.
Take note of the following items in regards to segmentation:
Source strings in XTM are segmented by individual sentences. This default setting can be changed.
The advantage is that XTM can incorporate ICE matching and provide smaller segments to translators, which increases their quality and efficiency.
Many other TMS vendors segment strings differently, oftentimes providing larger segments to translators. In such cases, the TM that is imported into XTM from the other TMS vendor will not always provide perfect matches.
Applying context to TM
Note
A single word or string may have multiple meanings. For example, an apple can be a fruit or a computer brand. Applying context will allow XTM to provide better suggestions for any segment and improve the accuracy of the TM Auto-Fill functions.
Tip
XTM has the ability to add custom context rules not indicated here. Please contact your XTM point of contact for more details.
The following methodologies can be used to apply context to segments stored in translation memory:
ICE (context) match
An ICE (In Context Exact) match is a translation that when matched against what's stored in TM, guarantees a high level of appropriateness because it has the same context
Important
In XTM an ICE match occurs when the source content in the current, previous and next segment is an exact match with the current, previous and next segment in TM (I.E the same location in a paragraph). ICE Matching is most relevant when source content is segmented by sentence as opposed to paragraph.
XTM Determines if an ICE or Leveraged Match exists using the following logic:
If the source text is identical to the one stored in TM, then XTM checks if a segment has a segment ID.
If the segment has a segment ID then XTM tries to find if an ICE (context) match exists by matching the source text segmentID with the one stored in TM for that string.
Tip
To include the segment ID in the TM please click here for instructions.
If the segment does not have a segment ID then XTM tries to find if an ICE (context) match exists by matching the source text alone.
When neither of the segmentID / context conditions is met, a leveraged match is returned.
When the translation is saved and the translation becomes approved for TM, XTM saves the translation in the TM and includes the segment ID (if activated) along with the source text, target text, and context (ICE match) by default.
Consider the segment We painted it red last week as used in the following paragraph:
My house used to be yellow.
We painted it red last week.
It looks very different now.
Is not a 100% ICE Match but is a Leveraged Match with the following:
My house used to be very ugly.
We painted it red last week.
It looks nicer now.
The original context was about a color scheme, but the context in the second paragraph is about beauty. Therefore the translation for the segment We painted it red last week may contain different adjectives to describe its beauty versus its.
TM penalty profiles
Penalty Profiles penalize the percentage match of a fuzzy match.
Tip
Example: Segment X has an 80% Fuzzy Match against an entry in TM. However, the TM entry was stored for the prescription drug product whereas the translation is applied to over-the-counter drug products. Both are different products and certain segments have slightly different meanings between products. Applying a TM penalty of 5% lowers the fuzzy match from 80% to 75% accordingly.
XTM can apply penalty profiles based on the following criteria:
Tags.
TM Status (Approved or Not Approved).
XLIFF:doc status (Translated, New, Rejected, Validated, Proofed).
Target Language for all projects or per project.
Note
This penalty (Target Language) supersedes all other penalty profiles when more than one is triggered.
Note
The only languages that can have an associated TM Penalty Profile are: Arabic, Dutch, English, French, German, Italian, Portuguese, Spanish
If Multiple ICE or Leveraged matches exist for a given segment.
TM penalty profiles are created in Configuration->Data->Tags->TM Penalty Profiles.
TM matching reference
There are four basic mechanisms for providing translation matches against translation memory and auto-filling against the contents of the translation memory:
ICE (context) match
An ICE (In Context Exact) match is a translation that when matched against what's stored in TM, guarantees a high level of appropriateness because it has the same context
Important
In XTM an ICE match occurs when the source content in the current, previous and next segment is an exact match with the current, previous and next segment in TM (I.E the same location in a paragraph). ICE Matching is most relevant when source content is segmented by sentence as opposed to paragraph.
XTM Determines if an ICE or Leveraged Match exists using the following logic:
If the source text is identical to the one stored in TM, then XTM checks if a segment has a segment ID.
If the segment has a segment ID then XTM tries to find if an ICE (context) match exists by matching the source text segmentID with the one stored in TM for that string.
Tip
To include the segment ID in the TM please click here for instructions.
If the segment does not have a segment ID then XTM tries to find if an ICE (context) match exists by matching the source text alone.
When neither of the segmentID / context conditions is met, a leveraged match is returned.
When the translation is saved and the translation becomes approved for TM, XTM saves the translation in the TM and includes the segment ID (if activated) along with the source text, target text, and context (ICE match) by default.
Consider the segment We painted it red last week as used in the following paragraph:
My house used to be yellow.
We painted it red last week.
It looks very different now.
Is not a 100% ICE Match but is a Leveraged Match with the following:
My house used to be very ugly.
We painted it red last week.
It looks nicer now.
The original context was about a color scheme, but the context in the second paragraph is about beauty. Therefore the translation for the segment We painted it red last week may contain different adjectives to describe its beauty versus its.
Leveraged match
A leveraged match is when a sentence or phrase in a translation memory (TM) is the same phrase in a different context as the sentence or phrase the translator is currently working on.
Tip
Context is determined via ICE matching.
Fuzzy matches
Refers to the situation when a sentence or phrase in a translation memory (TM) is similar (but not a 100% ICE or Leveraged match) to the sentence or phrase the translator is currently working on. The TM tool calculates the degree of similarity or “fuzziness” as a percentage figure.
XTM Workbench (CAT) tool will show up to 5 fuzzy matches with the highest match rate for a given segment.
Note
This is configured under configuration->Settings->Translation->TM in the Fuzzy Matches section.
Fuzzy Match rates are calculated using one of the algorithms described here.
Fuzzy repeats
Refers to segments with no matches in the TM, but that are quite similar to each other within the project to be translated.
XTM Workbench (CAT) tool will show up to 5 fuzzy matches with the highest match rate for a given segment. This is configured under configuration->;Settings->;Translation->;TM in the Fuzzy Matches section.
TM clean up tools
XTM provides an interface for a TM Expert to perform the following tasks on any individual segment in the TM:
Warning
Only the TM Expert role has access to this feature.
Change the translation text (target).
Change the TM Status (Approved or Not Approved)
Delete a Segment.
This is performed in the TM->Manage window on a per language combination and customer level.
Tip
The advantage of making changes in this location is that XTM provides a total of 14 filters (search criteria) to narrow down the entries being verified.
Auto filling translations
Note
Auto filling with TM entries is done first if machine translation is enabled.
Auto filling occurs each time a project starts or is reanalyzed.
The configuration is done here in the following sections respectively:
ICE Matches
Leveraged Matches
Fuzzy Matches
Fuzzy Repeats
Translations can be configured to auto-fill automatically with a TM entry when any single one or any combination of the following occurs :
ICE match autofill options
ICE Matches where inline variables are the same in the segment and in the TM are auto-filled by default.
ICE matches where inline variables in the source segment and TM entry do not match can also be auto-filled. In this case, the inline variable in the source segment is copied to the translation.
Leveraged match autofill options
XTM can also be configured to auto-fill leveraged matches where inline variables in the source segment and TM entry do not match.
In this case, the inline variable in the source segment is copied to the translation.
Fuzzy match autofill options
95-99%
85-94%
75-84%
Fuzzy repeat autofill options
95-99%
85-94%
75-84%
TM approval mechanisms
Note
XTM automatically stores segments in TM as unapproved.
By default, XTM does not approve any translations for a segment in TM unless the following configurations are made:
Adding a TM Approve workflow step as part of the workflows.
Note
This is an automatic step type that automatically approves all of the segments translated during the current workflow in the TM. The step is closed automatically once the segments are approved.
Within any step in a workflow, there is a checkbox option to approve TM. This automatically approves the segment's translation in TM once it's completed.
Note
This is typically used in a correction or review workflow step.
Manually (no configuration required) regardless of the current state of a project. Simply edit a project using the
icon and select actions->Approve TM for this project. This approves all of the translations currently in the project for entry into the TM.
Rules for overwriting TM entries
Segments that have a 100% leveraged or ICE match translation can optionally be edited. The new TM entry will be created if the translation for such a match is edited.
Tip
By default, translations populated by ICE and Leveraged TM entries are locked for translation. To change this setting go to Configuration->Settings->Translation->TM. In the first section; Matches General look for the Mark segments as locked when checkbox, and uncheck it in order to enable edits to such translations.
Any combination of the following criteria can be set for editing 100% leveraged or ICE matched translations:
Modify the existing TM record if the project segment has the same:
Modify the existing TM record if the project segment and Segment ID have the same:
Source (i.e. the segment source text is the same as the TM Entry).
Inlines (i.e. the segment source text has the same inlines as the TM Entry).
Context (i.e. the segment source text has the same context as the TM Entry).
Tags (i.e. the segment source text has the same tags as the TM Entry).
Segment ID (i.e. the segment source text has the same segment ID as the TM Entry).
Tip
To change this settings go to Configuration->Settings->Translation->TM. In the first section; Matches General and change the Modify the existing TM record if the project segment .. entries.
The TM is live, so whatever happens anywhere inside or outside the project can optionally be leveraged even as a full match within XTM Workbench (CAT) for the linguists.
This is done by opening the project editor's General Info Tab and choosing the customers whose translation memory is to be leveraged, even if these customers are outside the scope of the project.
Assign machine translation vendors to your application
Machine translation
Supported machine translation engines
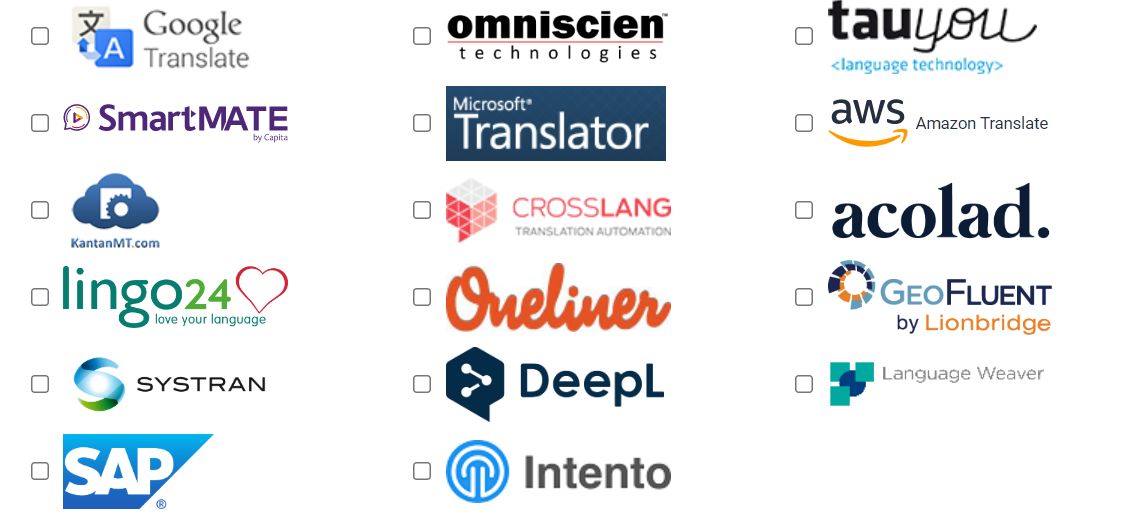
An application can have as many MT engines chosen from the list above.
If an MT vendor does not appear on the list then users can add custom engines in XTM.
Tip
Machine Translation engines are selected and configured globally by an Administrator for the entire application.
Determining where to configure machine translation engines
Once Machine Translation engines are selected globally by an Administrator, Individual Machine Translation Engines can be assigned from the Global selection list and configured down to the following level:
Customers:
Tip
Each customer can have specific MT Engines. MT settings at the customer level, override any machine translation settings configured globally by an administrator for this customer.
Configure the MT settings at the customer level using the instructions indicated here.
Tip
Why configure MT at the customer level?
Assigning an MT engine to a customer is useful for translation jobs that are only Machine Translated without any further edits, like internal communications or older technical blogs.
Some MT engines can be customized with unique subscription keys at the customer level as well, in case different departments have different licenses or MT engines.
Projects:
Tip
Each project can have its own unique MT engines. Any machine translation configurations here, override any machine translation settings configured in the customer and globally by an administrator for all customers in this project.
Configure the MT settings at the project level using the instructions indicated here,
Tip
Why configure MT at the project level?
Assigning MT engines here as opposed to a customer is useful for any job that requires post-editing of machine translations. An example use case would be to use MT to get a product out the door quickly and then correct the machine translations after the product has been released.
Auto-filling options and handling inline tags for machine translations
All MT engines are known to misbehave if source segments contain inline tags.
XTM provides the option to Autofill segments with Machine Translations or to provide matches to translators in Workbench.
XTM provides the following options to handle inlines and auto-filling:
Never: This will not autofill the translations of any segment but will provide matches to the linguist in Workbench.
Only if inlines are the same: This option will retrieve the MT translation and apply it (autofill) only if the inline elements match those that are in the source segment.
Always, fixing inline differences: This option will retrieve the MT translation and replace the inline elements (while auto-filling translations) in the MT translation with those in the source segment if any inline elements do not match up.
These options can be configured:
Within a Customer by a project manager.
Within a Project by a project manager.
Note
Project settings override customer settings which override global settings
Custom machine translation settings
Tip
Each Machine Translation engine contains custom features and settings unique to them.
Consult the MT Engine vendor documentation for a list of their unique features.
The most common custom features are the following:
Applying translations to terms found in XTM Terminologies, as opposed to applying the MT engine translations to these terms.
Tip
Available in Amazon and DeepL engines in the Project level MT settings.
Assigning unique language combinations to each MT Engine.
Tip
Available in Systran and DeepL engines in the Project level MT settings.
Allowing each customer to have unique subscription keys (Useful if each internal department has their own subscription).
Tip
Systran, Amazon, DeepL in the Customer level MT settings.
Free subscriptions.
Tip
Available in Systran
Using multiple machine translation engines in the same project
A customer or project may contain multiple Machine Translation engines.
Tip
It is advisable to select multiple engines only if these engines share a common custom setting such as being able to set unique language combinations per vendor.
Use Case: Three MT engines were configured, each with unique language combinations. E.g DeepL is configured for FR, and Systran is configured for HE.
All French translations will be retrieved by DeepL
All Hebrew translations will be retrieved by Systran.
All other translations in language combinations that are not assigned to a specific engine will be retrieved from both engines. If Autofill is enabled, then the translation retrieved first is used, otherwise, the translations from both engines are available as matches in XTM Workbench.
Tip
Using multiple machine translation engines may incur extra costs if not correctly planned out since the possibility exists of translations being retrieved at a cost from multiple engines for the same segment.
If Autofill is not enabled, then this could be one method to determine which engine linguists prefer based on which matches the linguists select. Costs can be minimized by testing free subscriptions.
Terminology settings
Administrators' guide to setting up terminologies checklist
Tip
For an explanation of Terminologies (Glossary) in XTM please consult this guide.
MANDATORY - Optimize the term display speeds in XTM workbench.
OPTIONAL - Add custom fields (Criteria for distinguishing translations for terms. E.g gender)
Important
Ask the terminologist if they require additions to the default custom fields that XTM supplies.
OPTIONAL - Create tags and use these tags to create terminology penalty profiles
Tip
Tags and terminology penalty profiles are necessary to remove certain terms from projects.
Only perform this when a terminologist or project manager requests this, as this is normally done during continuous localization, but can be done during project setup.
Optimize term display speeds in XTM Workbench.
Open the Terminology administration window using the instructions indicated here.
Go to the Terminology Engines section.
Check Match terms in analysis: This optimizes Terminology processing for larger terminology files.
Tip
Consult this guide on Optimizing Terminologies for more details.
Add custom fields
Tip
For more information on custom fields please consult this guide.
Tip
This function is performed by an Administrator.
Data – Custom fields – Terminology custom fields
Go to Configuration > Data > Custom fields > Terminology custom fields.
Select the Add button and enter a field name.
Choose one type:
Checkbox
Date
Dropdown: enter a list of values
Multiple selection: enter a list of values
Number
Text field
Select Save.
Note
TBX name refers to the term property when it is exported to a TBX file. The concept or term radio buttons enable you to define where the field should be displayed. The Active checkbox allows you to activate or deactivate this custom field.
Create tags
Add a tag group. The tag group will contain tags.
Note
Example: The tag group is product_X. Product_X contains a web app, mobile apps, technical documentation and marketing materials. Therefore the tags added to this tag group will refer to these four items.
Go to Configuration > Data > Tags > Tags.
Select the Add button.
In the Create tag group popup:
In the Tag group section:
in the Tag group text field, enter the tag group name.
optional - In the All customers checkbox, uncheck this box to select specific customers this group applies to.
Tip
Uncheck this box only if the number of tag groups becomes so big that you need to reduce the number of tags that are available to projects for easier selection.
Add tags to this tag group:
in the Tags section create the individual tag by typing in its name.
optional - In the All customers checkbox, uncheck this box to select specific customers this tag applies to.
Tip
By default the tag is available to all customers configured for the tag group this belongs to.
repeat steps a and b for each tag.
Click on the save button when done.
Data — Tags — Term penalty profiles
You can apply a penalty to term matches.
Go to Configuration > Data > Tags > Term penalty profiles.
Select the Add button.
Enter a penalty profile name and optionally a description.
Select the check box to make it active.
Select a tag group, operator, and term tags. The only penalty available is to remove the term and it will not be highlighted in XTM Workbench.
Select Save.
Configure project due date and other continuous localization criteria
Examine the default settings of the project creation automation and continuous workflow parameters.
Verify due date calculation criteria.
Tip
The Time tracking options on this screen are covered in the enabling estimations guides.
If time allows verify all of the other options on the project administration screens. These options are described in the reference guides indicated below:
Settings — Project: Grouping
You can enable automatically grouping files during project creation.
file extension (for example: pdf, tbx, html)
number of files in one group
number of groups
DITA map
Go to Configuration > Settings > Projects > Grouping.
Select Default setting.
Select one of the radio buttons to group files either by the Extension or by the DITA Map level.
Optional: for the DITA Map level, enter the required level.
Create a new project as usual.
In the Project Editor go to the Groups tab.
Select the Group automatically.
Go to Configuration > Settings > Projects > Grouping.
Select Permit. Grouping checkbox is added to the Translation section in the Add project and Project template.
Create a new project in Projects > Add project.
Fill in as required.
Under Translation tab, select Grouping files checkbox.
Select one of the radio buttons to group files either by the Extension or by the DITA Map level.
Optional: for the DITA Map level, enter the required level.
Uploaded files are grouped according to the chosen criteria in the Project Editor > Groups tab.
Settings — Project: Joining files in sets
The Configuration > Settings > Projects > Joining files in sets section provides the configuration for joining files during project creation.
Note
The file joining options are not available for bilingual files.
When files are joined, Visual mode cannot be enabled in XTM Workbench.
Defines whether the file joining options are disabled, displayed in the simple or extended form. When file joining is enabled for a project, languages cannot be updated in the project.
Go to Configuration > Settings > Projects.
Joining files in sets > Default value
Select Save.
This option sets the file joining option as activated or deactivated by default during project creation.
Configuration > Settings > Projects > Joining files in sets > Join files by When the extended interface is selected for the settings, it is possible to join files by:
Extension: all files with the same extension are merged and displayed in the project as one.
DITA Map level: files matching a specified DITA map level will be merged and displayed in the project as one. Files are joined only within a given substructure of the specified level which means there can be multiple resultant files of the same level. The number of resultant files matches the number of parallel substructures of the specified level. XTM recognizes the depth of DITA map structures based on <topichead> and <topicref> tags. Their presence is required for the DITA Map level files joining to work. The resultant file names inherit the structure name and names of files joined together.
Example 1
DITA Map level 0 | all files will be merged into one |
DITA Map level 1 | files within each substructure of level 1 will be merged into one |
DITA Map level 2 | files within each substructure of level 2 will be merged into one but files of substructure level 1 will not be merged |
DITA Map level 3 | files within each substructure of level 3 will be merged into one but files of substructure levels 2 and 1 will not be merged |
Example 2
DITA Map level 0 | one resultant file is generated from all files uploaded for translation |
DITA Map level 1 | one resultant file is generated from all files within group “b” |
DITA Map level 2 | all files from topichead “a” are merged into one file, file 14.dita remains separate |
DITA Map level 3 | all files from topcicref “a” are merged into one file, file 14.dita remains separate |
DITA Map level 4 | all files from topcicref “a” are merged into one file, files 13.dita and 14.dita remain separate |
<topichead navtitle="b">
    <topichead navtitle="a">
        <topicref type="topic" id="a" href="topic/section/9.dita">
            <topicref navtitle="test section" type="topic" id="a" href="topic/section/10.dita">
                <topicref type="topic" id="4" href="topic/section/11.dita"/>
                <topicref type="topic" id="4" href="topic/section/12.dita"/></topicref>
            <topicref type="topic" id="a" href="topic/section/13.dita"/></topicref>
    </topichead>
    <topicref type="topic" id="a" href="topic/section/14.dita"/>
</topichead>
XTM supports DITA packages with customized DITA root node names. Joined DITA files can be displayed in XTM Workbench according to the hierarchy defined in the DITA map.
Settings — Project: Project views
If a project contains multiple files, you can enable automatic project grouping.
Go to Configuration > Settings > Projects > Project views.
Select Show Grouping when project has more that X files.
Select Save.
When the number of files exceeds a defined limit then the grouping tab automatically is displayed in the Project Editor.
If you have a single language project with many files you can also manage the project at a language level rather than at a file level. The number of files in a project when this is visible is set in a similar way.
Go to Configuration > Settings > Projects > Project views.
Select Show Language view when single project has more than X files.
Select Save.
Settings — Project: Project types
In Configuration > Settings> Projects > Project types you can enable alternative translations and anonymization and choose the segmentation method for projects with alternative translations.
Alternative translations
Alternative translations. This option is often used for transcreation projects. When activated, the layout of XTM Workbench changes to allow the translator to enter alternative translations and back translations.
Go to Configuration > Settings > Projects > Project types.
Select Alternative translations > Default setting.
Enter the default number of alternative translations.
Select Save.
The settings entered here for the system can be modified for the customer and specific projects. XTM displays each source segment the specified number of times in XTM Workbench. There is a recommended translation followed by a set number of alternative translations, all of which can be completed by the translator. Each alternative translation has a field to enter a back-translation.
Alternative translation report can be generated and downloaded from Project Editor, Files tab or Previews. The report is an Excel file containing all the translations, back translations, and comments in one sheet.
Tip
The comments section can be used as a place to enter the explanation for each translation. A reviewer may choose the required alternative translation and copy it from the alternative to recommended translation. Only the recommended translation will be used to generate the target document.
Alternative translations segmentation. If the alternative translations option has been set, you can choose whether to segment the source text in paragraphs or use the standard segmentation rules for your system. The segmentation method will apply to all customers and projects when processing projects with alternative translations.
Anonymization
The anonymization feature is based on Named Entity Recognition (NER) and it attempts to identify confidential data by converting it to inline tags. This applies to the following languages:
Danish
Dutch
English
French
German
Italian
Portuguese
Spanish
Swedish
Go to Configuration > Settings > Projects > Project types.
Select Use Anonymization.
Select Save.
Confidential data is converted into inline tags in XTM Workbench.
Protecting sensitive data during translation in XTM explains in detail how to use MS Word styles to convert sensitive data into inline tags during translation.
Settings - Project: Monitor customer inactivity
Inactive customers are accounts that have not created a project in XTM for a certain period. XTM Administrators can define this period of customer inactivity and decide if and when the Project Managers should be notified as soon as the customer becomes inactive.
Configuration > Settings > Projects > Monitor customer inactivity > Notify PMs about customer inactivity at – choose the time at which XTM will check for customer inactivity and send email notifications to Project Managers. The two actions are nearly simultaneous: the time lag between the two actions is 2 min. For example, XTM checks the inactivity at 2 pm and the Project Manager receives the notification at 2:02 pm.
Configuration > Settings > Projects > Monitor customer inactivity > Notify PMs about customer inactivity for – enter the customer inactivity period (in hours) that would trigger an email notification to the PMs.
Configuration > Settings > Projects > Monitor customer inactivity > Send emails to – choose the Project Managers who will receive the email notification
Configuration > Settings > Projects > Monitor customer inactivity > Include all customers – by ticking this checkbox, XTM will monitor inactivity for all customers
If you want to monitor inactivity for selected customers rather than all customers, the Administrator or the PM needs to enable this option for each specific customer individually.
In Configuration > Settings > Projects > Monitor customer inactivity, deselect the Include all customers checkbox and save your choice.
Go to the Customers tab and open the customer record of your choice.
Under the customer menu icon, select Settings
 > Monitor customer inactivity section.
Select the Notify PMs if this customer is inactive checkbox.
Save your settings.
Note
If Include all customers option is enabled in the system configuration, the Monitor customer inactivity section will not be displayed in the Customers settings and you will not be able to activate this option for individual customers.
Settings - Project: Statistics processing
Decide when project statistics should be processed. Instead of processing them when workflow changes, you can have them updated once the whole project is finished or once a task is finished.
Go to Configuration > Settings > Projects > Statistics processing.
Select Enable processing statistics of finished tasks.
Select Save.
Enable the generation of estimates
Checklist for enabling the generation of estimations
Tip
Check off the completion of each task in the order indicated.
OPTIONAL - Create language groups consisting of languages whose rates are the same.
Tip
Although this step is optional in XTM, it is a practical necessity when translating into many languages.
OPTIONAL - Define company-wide subject matters indicating the company's domain expertise.
Tip
Skip this step if linguists are not charged based on subject matter expertise, but simply charged based on their language expertise.
OPTIONAL - Enable hourly rate card and time tracking options.
Tip
Only perform this function if any workflow steps configured incur charges based on hours worked.
OPTIONAL - Create a workflow specifically for creating a rate card more easily.
Important
Skip this step if you intend on using XTM to generate purchase orders as well as estimates. Purchase orders require creating rate cards assigned to individual linguists, whereas this step assumes rate cards are being assigned to dummy users.
Define default currencies and exchange rates
Tip
The purpose is to define the default currency for which linguists are paid and to define any exchange rates for those linguists that are not paid in the default currency specified here.
All estimations generated will be in the default currency specified here.
Important
This is a mandatory step for generating estimations.
From the top menu in XTM Cloud click on Configuration.
From the menu bar just to the bottom click on Data.
From the left-hand side menu bar that appears, click on Estimates.
Just to the top of the frame that now appears, click on the Exchange Rates tab.
Enter the System Billing Currency.
Note
This will be the currency used for all cost estimates.
Enter the Financial year Start Date.
Click on the Save button just below.
Add Exchange Rates by following the procedure below:
Note
Exchange rates are used if linguists and other paid staff charge their services in currencies other than the system Billing Currency.
Each user's default currency is specified in the User configuration screens under the General tab.
Click on the blue Plus sign.
From the drop-down list box that appears, select the Currency that you are converting from.
Just to the right enter the exchange rate.
Tip
If the system billing currency is USD then please go here for IRS sanctioned exchange rates.
If the system billing currency is CDN$ then please go here for Bank of Canada exchange rates, which are always calculated as a single rate at month's end.
If the system billing currency is in Euro then please go here for ECB Exchange rates.
Click on the Save button.
Repeat steps a-d for each exchange rate.
Create language groups
Tip
The purpose is to group languages together that have the same costs for each workflow step.
From the topmost menu in XTM Cloud click on the Configuration tab.
From the menu items just below, click on the Data tab. A menu will appear on the left-hand side.
From the menu on the left hand click on the Language Groups tab.
Click on the
 plus sign to create a new language group.
Enter the name of the language group and click Save. An example language group name can be ISPG (Italian, Spanish, etc.).
On the left-hand side, a list appears containing all of the target languages configured previously. From this list select the target languages that will belong to this group and click the blue right arrow button just to the left, in order to add them to this group.
Repeat steps 4-6 for each language group that will be added.
Tip
For more information on using language groups, click here.
Define subject matters
The purpose of this procedure is to define the subject matter of the content being translated by the organization.
Tip
This is only necessary for specialized industries that require specialized translations (i.e linguists with this specific domain knowledge) which are usually more expensive or take longer to do.
From the topmost menu in XTM Click on Configuration.
To the bottom and to the left click on Data.
From the left-hand side menu, click on Subject Matter Factors.
Select the Subject Matters to delete by clicking the checkbox beside their name, and from the top click on the blue delete subject matters image.
Tip
It is useful for both administrators and project managers if you remove any unnecessary subject matter as it makes it easier to only assign those subject matters that apply to your company.
Add Subject Matters by clicking the blue add subject matter image located at the top of the screen. Then scroll to the bottom and fill in the appropriate field in the blank text boxes that now appear.
Tip
Keep the price factor and duration factor at 1.0. These items are used for legacy functionality from older versions of XTM
Enable hourly rate card and time tracking options
Note
Rate Cards are used for estimating and invoicing the costs associated with a translation job.
Important
Some of those costs can be attributed to workers whose job is charged hourly, such as project managers, or to workers such as linguists whose job can sometimes be charged both hourly (e.g DTP) and per word/character.
There are two places where hourly rates need to be enabled. Use the following checklist to track your progress:
Configuration of project settings.
Note
Must be configured by an administrator.
Configure each workflow where hours worked is tracked.
Note
Must be configured globally by an administrator and can be overwritten by a project manager at the project level once the workflow has been assigned to that project.
Configuration of project settings to enable hourly rate cards
From the topmost menu in XTM Cloud click on the Configuration tab.
From the menu just below click on Settings.
From the left-hand side menu, click on Projects.
Go to the Time Tracking session located near the bottom of the screen.
From the Enable Manual Time tracking for drop-down select whether to track time for Project Managers only or Project Managers and linguists.
Configuration of workflows to enable hourly rate cards
Important
This setting can be overwritten in any individual project by a project manager from the workflow tab in the project editor.
Create a workflow specifically for the creation of rate cards
Tip
Rate cards assign rates to every workflow step that a given user is assigned to across all unique projects with their unique workflows.
Therefore by creating a workflow that contains every workflow step, project managers will only have to create rate cards for one dummy user against this all-encompassing workflow, instead of creating rate cards for multiple dummy users, each one representing a unique project with a unique workflow.
Important
Prerequisite: Ensure all workflow steps your organization will use have been defined.
Important
Do not perform this step if you intend on using XTM to generate purchase orders as well as estimates
Add all possible workflow steps that will be used to the workflow being created. Use the procedure below to create the workflow:
Creating and editing workflows
To create a new workflow definition:
Go to Configuration-> Settings-> Workflow.
In the Workflow definitions tab click the Add button.
To Edit an existing workflow definition:
Go to Configuration-> Settings-> Workflow.
Find the workflow and double-click on its name or click the
icon and select edit.
Continue by modifying the fields as follows:
In the Create workflow definition popup:
Set the mandatory Name parameter for your new workflow definition.
Note
By default, XTM will automatically generate a name for the workflow based on the steps you choose.
Optionally, in the Description parameter, provide the workflow description.
Activate or Deactivate the workflow using the active check box.
Define the first workflow step from the drop-down, by selecting the Workflow Step.
Note
You can define your own workflow steps. Check Workflow steps and Workflow steps parameters for more information.
Fill in the remaining options using this workflow field reference as a guide to choosing the fields to fill out.
Add the next workflow step by clicking on the
 button just above the workflow step dropdown.
A drop-down now appears between the two steps allowing the selection of a transition type (E.g does the previous step need to be completed before the current step starts, can both steps run in parallel, etc.).
Note
The transition types are described here.
Repeat steps 3 and 4 until the workflow is complete.
Note
To remove a workflow step click on the
 button just above the workflow step dropdown.
Click the Save button when done.
Workflow field reference
Approve TM:
By checking the box here, segments are saved into the TM once the individual segment is completed.
As an example, checking this option is ideal for approving each segment/string once it's been reviewed or corrected.
Note
There is also an Approve TM workflow step. In this case, all segments in the previous steps are not approved for the TM until this step is completed. In other words, it executes after a step is completed as opposed to when a string/segment is translated/reviewed/corrected.
Percentage of whole workflow duration:
How much of the entire project workflow time in percent should be automatically calculated for each of the steps
Calculate costs based on manual time:
Allows the ability for a project manager to enter the number of hours worked for this step both for estimation purposes prior to project start and for invoicing purposes.
Note
To have this option appear then enable it using the instructions here.
Chargeable:
This can be useful if the customer has pre-purchased a certain level of service. If this level of service is exceeded, then the step may become chargeable.
The Cost settings tab allows you to switch this feature on and off and decide if it should be accessible for linguists or only project managers. You can also select the default cost type used
Note
To have this option appear then enable it using the instructions here.
LQA:
LQA allows errors to be categorized into one of the many predefined error types XTM provides.
Along with being able to enter comments, this allows for better traceability and continuous improvement initiatives.
Selecting the option here allows an LQA check immediately after each segment is translated/reviewed/corrected. Typically this option is enabled with a review step.
To configure LQA codes follow thisprocedure.
Tip
There is also an LQA workflow step available. A workflow step starts after a previous workflow step (i.e all segments have been processed) has finished. Whereas enabling LQA here allows for LQA checks to be performed immediately after a segment has been processed.
Notify project watchers when finished:
When checked, an e-mail is sent to all Project Watchers when a workflow step is completed.
Project Watchers are configured for each customer in the details section.
Calculate edit distance:
Important
This option is specific to minimizing invoiced costs for Machine Translation corrections during Correction type workflow steps.
This allows XTM to only measure the number of words or characters changed when correcting Machine Translated text, thus lowering the amount that linguists can invoice for MT translated text.
Without this option, all of the words in a Machine Translated segment are counted for any correction performed.
Set XTM status to green/done:
Auto-finish step on its due date:
Regardless of the status of the last step, this option when checked closes the project on its due date.
The due date is set in a Projects general section.
This option can trigger based on one of the following conditions:
The due date as it was originally entered.
Only when the due date is modified after a project has started.
Note
To have this option appear, goto the workflow options section and check the box beside the Auto-finish step on its due date option.
Once this is enabled then an option will appear to configure the triggering mechanism.
All segments must be completed to finish the task:
The default method for a workflow step to be deemed complete is by having the linguist/PM manually click a finish button in XTM Workbench at any point during a workflow step.
If this setting is checked, then the finish button is only available once all segments/strings are completed for the assigned task.
Warning
if ICE and/or leveraged matches are automatically locked then set them to complete in the project settings. Alternately allow linguists to unlock settings.
Blocking mechanism between workflow steps


Configure the security settings
Tip
Enforce your specific company security-related policies such as passwords, in this step.
Configure security settings
Note
XTM is a secure environment. XTM Cloud uses an SSL certificate to ensure secure communication via HTTPS and we recommend the same for all XTM Suite installations as this not only improves security but ensures compatibility when connecting different instances of XTM for subcontracting.
From the topmost menu in XTM Cloud click on Configuration.
Just below and to the left click on Settings.
From the menu that appears on the left-hand side, click on Security.
From the remaining options, Implement your company's security policy. Consult the guide for each section indicated below:
Click on the Save button when done.
Authentication settings
The function is enabled by default. If this function is switched on, Administrator can decide how users can log to XTM: via User Interface and API, via UI only, or API only.
Go to Configuration > Settings > Security.
Select the Allow API authentication for new users checkbox.
Select Save.
The Authentication section in Edit user > Access rights will be displayed only for users with PM roles.
Go to Configuration > Settings > Security.
Select the Use 2-step verification checkbox.
Select Save.
Log out from XTM.
All users are required to go through the 2-step verification process to log in to XTM.
If the user makes the number of invalid login attempts specified, then their account will be blocked, and they will not be able to access the system.
unblock the account, the Administrator needs to go to the Users tab and select Unblock account from the menu icon
 in the left-hand column of the users listing.
Go to Configuration > Settings > Security.
In the Allowed log on attempts enter the number of times the user can try to log in.
Select Save.
If the user makes the number of invalid login attempts specified, then their account will be blocked, and they will not be able to access the system. The account will then need to be unblocked by the Administrator.
If the user does not log into their account during the period of days specified, then the account will be blocked. The account will then need to be unblocked by the Administrator as described above.
Go to Configuration > Settings > Security.
In the Disable account after non-use (days) enter the number of days after which the user cannot access the system.
Select Save.
If the user does not log into their account during the period of days specified, then the account will be blocked. The account will then need to be unblocked by the Administrator.
Computer activation level
This setting specifies who will need to go through the PC activation process on the first login. The process involves generating an automatic email.
Go to Configuration > Settings > Security.
In the Computer activation level select who needs to go through the activation process on the first login:
All users
All users except customer Project Managers
Only Project Managers
None
Select Save.
Passwords settings
Feature | Description |
|---|---|
Allow users to change their password | Allows users to change the password which the Administrator or PM assigned to them when creating user accounts. |
Password duration (days) | Specifies the number of days that user passwords will be valid. After this period the user will have to change their password. |
Check against previous passwords | Specifies the number of previous passwords that cannot be used as the current password. |
Minimum password length (characters) | Specifies the number of characters required in the password. |
Use brute force dictionary | Defines the words that cannot be used as or in a password. By default, the following words and components are excluded:
|
Force password change on the first login | Check to enforce this measure. |
Password strength | Password characters are split into 4 groups:
There are 3 levels of password strength
|
Privacy settings
Use this section to define who can update segment comments and hide the names or details of other users of the system.
The list describes the places where user information is displayed in XTM Workbench. These are:
Segment comments
Additional information about the TM match
Additional information about terms
Who is locking a segment
Segment filters
For each area there are three options:
Everyone can see the user information
Only Project Managers can see the information
No one can see the information.
Go to Configuration > Settings > Security > Privacy.
In the Allow segment comments to be updated by
All users
Creator only
Only in current step
Select Save.
Go to Configuration > Settings > Security > Privacy.
In the Display user details in comments for select who needs to go through the activation process on the first login:
All users
PMs only
No one
Select Save.
Go to Configuration > Settings > Security > Privacy.
In the Display user details in comments for select who needs to go through the activation process on the first login:
All users
PMs only
No one
Select Save.
Go to Configuration > Settings > Security > Privacy.
In the Display user details in segment filters for select who needs to go through the activation process on the first login:
All users
PMs only
No one
Select Save.
Go to Configuration > Settings > Security > Privacy.
In the Display user details in terms for select who needs to go through the activation process on the first login:
All users
PMs only
No one
Select Save.
Go to Configuration > Settings > Security > Privacy.
In the Display user details in TM matches for select who needs to go through the activation process on the first login:
All users
PMs only
No one
Select Save.
This option allows Administrators to decide what information should be visible to other users
Go to Configuration > Settings > Security > Privacy.
In the Information to display about users select who needs to go through the activation process on the first login:
Username
User ID
First and last name
Initials
Select Save.
Sending administrator messages to other roles
Sending administrator messages to other roles
Note
For more information please consult the guide here.
Click on the New Message button located at the bottom of the frame.
Enter the Title of the message, and then the Content.
Set the Starts and Expires date, before and after which the message disappears.
Note
It will be shown until the expiry date set by the admin but each user can decide to dismiss it and not show it again.
For on prem-solutions checking the On Server shutdown box, displays the message each time the XTM server is shutdown.
Add the user roles that this message will appear to.